


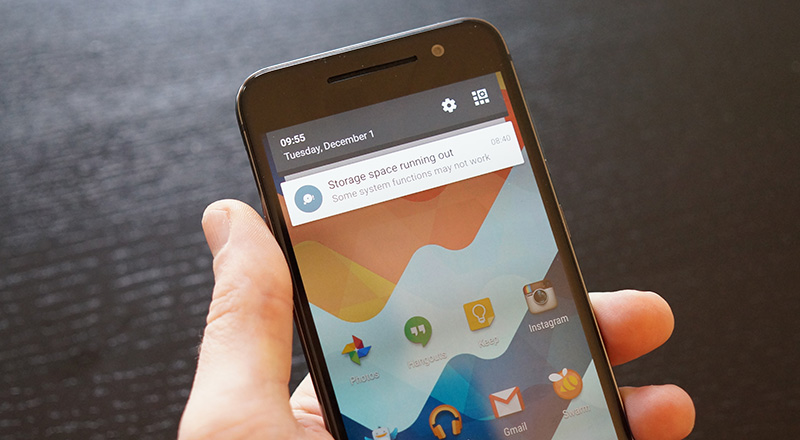
Anyone who’s used an Android phone for more than a few weeks is likely familiar with Android’s low storage notification which pops up when the system storage on the phone is running low. Thankfully, Android Marshmallow comes with a new adoptive storage feature which will help eliminate your low storage woes, as long as you have a phone which supports expandable storage.
What is adoptive storage?
Since the introduction of the HTC G1 (the very first Android phone), Android has supported expandable storage. Initially, microSD cards were only used for media storage, but Google eventually released an update which allowed users to move over data from applications which featured large media assets or stored large cache files to run smoothly. While the feature worked fine, developers had to change their apps to support it and the user had to manually select which apps they wanted to move over to the microSD card.
Android Marshmallow’s new adoptive storage feature works differently since it takes the capacity of your microSD card and fully integrates it into the system storage on your phone. This allow the system storage on a phone that sells with 16GB of internal memory to be expanded up to 216GB if you insert a 200GB microSD card into the phone.
What you’ll need
- An phone with a microSD card slot, running Android 6.0 (Marshmallow) or higher
- A class 10 or higher, high-capacity microSD card (UHS 3 cards offer the best performance).
- SanDisk 200GB class 10 – $99.99
- PNY 128GB class 10 – $39.99
- Lexar 128GB UHS 1 – 69.99
- Lexar 64GB UHS 3 – $34.99
Adoptive storage warning
If the microSD card you are planning to use for adoptive storage has been used before, make sure that you create a backup of the card before you start. This process will completely erase all data on the card.
Also, once you format your card to be used as adoptive storage, the card will need to be inserted into your phone at all times for it to function properly. If you no longer want to use the microSD card for adoptive storage, please see the instructions at the bottom of this post.
Format your microSD card as adoptive storage
Adding adoptive storage to your phone is fairly simple, but the process can take up to 30 minutes depending on how large the microSD card is and how much data you already have on your system partition.
- Insert your microSD card into your phone
- Navigate to Settings > Storage and select your microSD card
- Tap the menu icon (three vertical dots) in the top right corner and select settings
- Tap Format as Internal
- Once you read through the details of the process, select Erase and Format
- Select Format again to confirm the request
- After formatting is complete (this takes 2-5 minutes), select Move now and then tap Next to move apps, pictures and videos to the new microSD system storage partition
- The next screen will show how much data will be moved and how long the process will take
- Tap Move to start the process
- Once the data is moved, tap Done to finish the process
From the Storage menu, you can now view and manage the data that is installed on default system storage and the microSD card. When you install new apps, the phone will automatically determine where they will be installed – giving you peace of mind, knowing you have dozens, if not hundreds of additional system storage on your device.
Removing adoptive storage from your phone
The only real reason you should want to remove your microSD adoptive storage is if you really need the card for another device or want to upgrade to a larger or faster card. Simply pulling the card from your phone isn’t a good idea since the card’s storage capacity is fully integrated into the system memory, storing your apps, music, picture and other files. Follow the steps below before removing your microSD card.
- Connect your phone to a computer via USB and back up images, video and any other files you don’t want to lose.
- On the phone, go to Settings > Storage and select the microSD card
- Tap Apps to view which applications are installed on the microSD card
- Option 1: Move the app to the main system portion, tap the app > Change > Move. Repeat this step for all the apps you want to keep.
- Option 2: Uninstall these apps through Google Play or go to Settings > Apps to uninstall them
- Once you have moved or uninstalled all the adds form the microSD card, Tap the menu icon (three vertical dots) in the top right corner and select Format as portable
- On the next screen, select Format
This process completely formats the microSD card so that can be safely removed from your phone and used in other devices.

its fat 32 like m9? so the limit is 4 gigas continue video !!
Please tell us more about “adoptive” storage – is that anything like “adaptive” storage? Can lesbians use adoptive storage in Alabama now that the Supreme Court has refused to hear the appeal?
Thanks for the info I truly appreciated it. It was quite helpful(even with a few typos, we still understood what you were saying . Thanks again!
I use this feature and my phone still runs out of space because the apps won’t store on the SD card. I never had such problems when using Gingerbread, apps could be installed onto the SD card without issue.
I have a problem. I inserted a new Kingston MicroSDHC 32GB UHS-I U3 to my M9 and went to adopt it as internal storage as you showed us, but after the scanning of the sd, i get the message that the inserted sd card is too slow to be adopted!!! Note that the newly bought sd card has read speed 90MB/s and write speed 80MB/s,and is designed to be capable to store and read 4K videos. What should i do?
Perseid why don’t you go take a cold meteor shower and then go and put on your big boy pants or Ima coming out the internet and wup your crybaby ass. I don’t like to do that but I will if you continue being a wanker.
Get the f*#k out of here, anonymous troll!
Interesting, is working on android 5?